Making nut or seed butter at home and How to Get Your Kids to Eat Anything, part 2.

My last post was all about how to make lunch fun and why any busy parent would bother. Here, you can find some of my favorite tools for creating fun and interesting lunches, plus our favorite lunchbox.

madewithover-15

Today, I’m sharing a few more ideas for healthy, well rounded lunches or snacks. My kid won’t touch a sliced plum but if I cube it and skewer it, he loves it. Go figure. More proof that when it comes to kids, visual appeal is everything.

I found some of our favorite skewers at Ross for around $3. For one stop shopping for everything bento, check out Bento USA. They carry picks, sticks, and the cute flexible bowls you see above. The sticks and skewers are sharp but I send them with my 4 yr old and haven’t had a problem after explaining that he wouldn’t be able to take them again if he misused them. If you or your school are not comfortable with sticks, try raw spaghetti noodles, a skinny handle of a spoon, or pretzels!

Here are just a few ideas for sticks and picks.

DSC_4028

Around here, we call these Sweet Potato Pops and it’s how I got the guy to eat them at all. They couldn’t be easier to make. Rinse and cut a sweet potato into 1″ chunks, toss with a bit of melted coconut oil, place in a single layer on a nonstick baking sheet, and roast at 400 degrees for 35 minutes or so. When they are soft, remove from the oven and add pretzel sticks!

DSC_4031DSC_4032

For pasta sticks, you could use tortellini, rolled lasagna noodles, gnocchi, ravioli, etc… Serve with sausage or meatballs, cheese chunks, or cubed tomatoes. Add a small container of dipping sauce or coat with your favorite red sauce.

DSC_4029DSC_4030

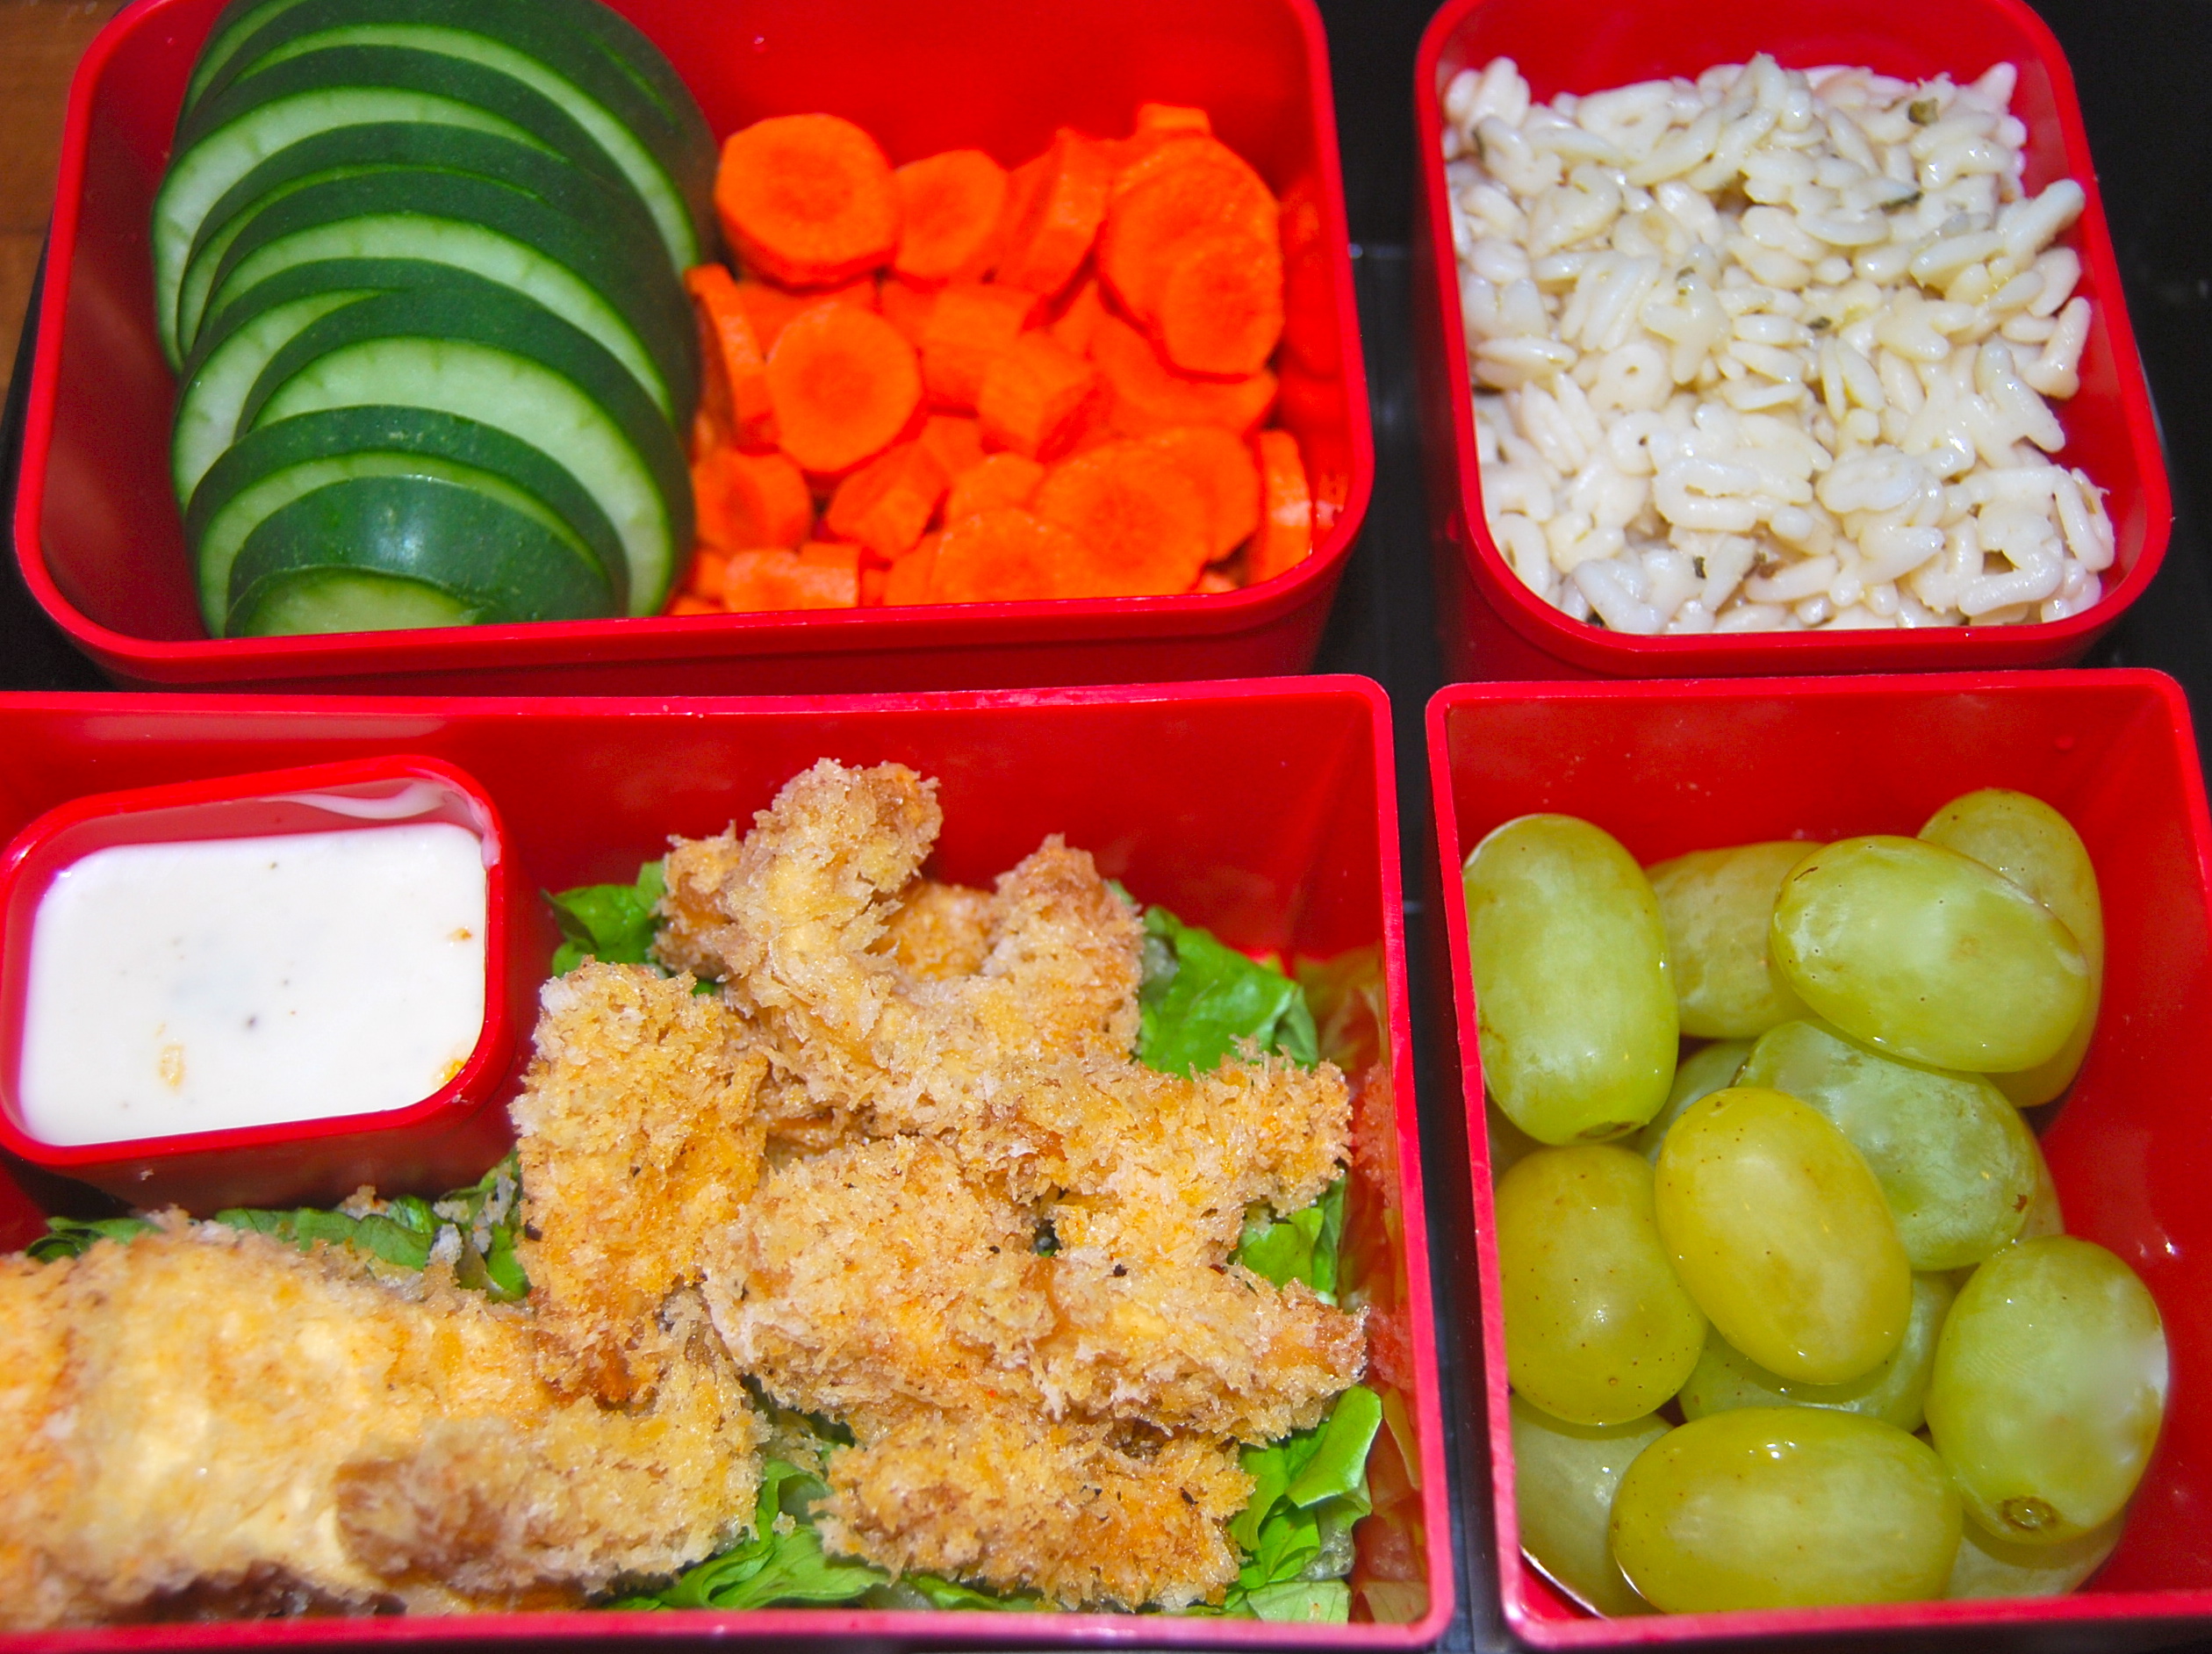
Raw veggies and fruit are so much fun if they are cut into cute shapes. Again, serve with dipping sauce (dip dip, as my son calls it). The tiny sauce container that came with our Laptop Lunchbox is just right.

DSC_4034

Fruit sticks and rolled sandwiches are so easy and the options are endless. Melons, grapes, berries, apples (soak them in apple juice or lemon water to keep them from browning), or cubed oranges. For sandwich rolls try cream cheese with deli slices, hummus and matchstick veggies, peanut butter and jelly, or pizza rolls with cheese and olives with marinara dipping sauce. You can use tortillas, pitas, or sandwich bread to hold it all together.

I thought I would include instructions for making homemade peanut butter. It’s delicious and ridiculously easy, not to mention lacking in several nasty ingredients that are often included in store bought. This also works for sunflower seeds, if your kid or school is nut free. Just add a teaspoon or so of olive oil to the seeds to make them easier to blend.

DSC_3964DSC_3965

DSC_3969DSC_3981

That’s it. Really! Raw or roasted, salted or not. Throw them in the food processor and let it go for around 3 minutes. It’s the freshest tasting peanut butter you will ever eat and you can add cinnamon, honey, or smoked paprika if desired. Store in a mason jar in the fridge for up to a month for the best flavor, though ours never lasts that long.

Are you feeling inspired to make some Fun Food? I hope so! I would love to see or hear about your creations!

How To Get Your Kids To Eat Anything

Do your kids lunches sometimes come home only half eaten? Do you wonder how much of their own lunch they ate, how much they traded, and how much ended up in the trash? If you have been anywhere near Pinterest or a recent parenting magazine, you have probably noticed the bento craze sweeping the nation. Bento boxes usually have several small boxes that fit snugly in a larger box that holds it all together. It makes it easy to pack smaller portions of a variety of things, for a more well rounded meal. Because the bento pieces fit together so well, it’s easy to create “art” with the food and know it will still look that way when your kid opens it at lunchtime. We bought ours from laptoplunches.com. Yes, it cost a little more than some lunchboxes but it came with a recipe booklet, silverware, and an insulated carrier. Plus, it’s BPA, lead, phthalate, and PVC free. After a few months of not buying plastic baggies, it ends up being cheaper than a plain lunchbox or paper bags.

K430_BLKBLU_175x175-bento-lunchbox

Why would anyone go to so much trouble? Well, because I guarantee that your kids will be willing to try more foods if they look cute. Does yours take one look at something they have never tried and say “I don’t like that”? Mine too. Visual appeal is huge.

This?

DSC_4006

Or THIS!!?

madewithover-14

Start to finish, this took around 10 minutes active time since the starfish crackers were premade and frozen.

This weekend I’ll share some of the tools I use and tricks I have picked up for making a visually appealing, healthy lunch. I’ll also share some easy recipes that are a huge hit in our home. Since I started making “fun food”, my 4 yr. old has starting eating salad, olives, hard boiled eggs, sweet potatoes, raw carrots and cucumbers, and many other things he would not have touched before.

The first tools I want to share are cutters. Cookie cutters aren’t just for cookies anymore! I had several in my kitchen already and have added to my collection over the last few months. Every time I go to a discount store like Ross or Marshalls, craft stores, or even Target and the grocery store, I keep my eyes open for cute cutters. They are usually around $2 – $5 so picking up one or two is not a big deal. If you’re an online shopper, you will find any cutter you could imagine at Cookie Cutter Company for very reasonable prices.

DSC_3999 DSC_3992

DSC_3993DSC_3995

They’re not just for sandwiches! Use cutters for tortillas, potatoes, homemade crackers, omelets, cheese slices, veggies and fruit, tofu, lunch meat, etc… They make anything fun!

School last week was all about letters and learning to spell and write names so I made baked tofu nuggets that spelled out his name. I packed it with alphabet pasta to continue the “theme”.

DSC_3961

Fun, yes? And so easy. I made the nuggets the day before and served the extras for dinner, packing the letters of his name in the container so it would be ready in the morning. The pasta was also leftover from a snack. The rest of the meal took around 5 minutes the morning of. How easy is that? Who wouldn’t love to open the lunchbox and see something like this? Serving someone fun food is like a hug. It takes a little extra time but is always worth it, in my opinion.

Not long ago, I read that the vegetable toddlers consume the most of is french fries. That is so sad and completely avoidable. Join the fun lunch revolution! Let’s raise some healthy eaters who try new things!

Young Coconut Cocktail

madewithover-13

I must confess, I have a coconut problem. I can’t get enough coconut oil, milk, flakes, and water. It’s delicious and so good for you. It’s full of good fats, loaded with electrolytes, and will boost the metabolism. It also removes harmful free radicals to help prevent degenerative disease and premature aging. Need any more reasons to try it? Well, how about the most delicious drink ever? I’m not exaggerating. My husband’s response when he tasted it went like this “Mmmm. MMMMgulpMMMMM!!!” It’s that good.

The first step is opening a young Thai coconut. It takes a little practice and requires a good sharp knife. Obviously, this is not something you want your kids helping with.

First, place the coconut on a good heavy cutting board. Wood is ideal. Slice all around the top of the coconut, removing the white husk till you get down to the hard shell.

DSC_3923

Then, whack your knife around the top till you find a softer spot. You can either smack the knife into this spot or carefully stab the tip in. PLEASE be careful! Pry up the top just like a can. Pour the coconut water into a blender.

DSC_3925

Next, remove the meat. It can vary in color from a slightly purplish grey to pale yellow. The meat may be super soft like jelly or closer to very firm tofu. All are fine. Using the back side of a spoon, get under the edge of the meat and scoop into your blender being careful not to get any of the shell.

DSC_3931

Blend well. It will be pretty thick but so yummy. You could add water to thin it down but my family motto is Water Schmater. However you say that in Latin, I forget. Anyway, the ideal thinner would be spiced rum. Pour desired amount into the empty coconut shell, add the fresh coconut milk and stir. Add a straw and a tiny umbrella if you’re feeling fabulous. Cheers, Dahlings!!

The Very Best Veggie Noodle Soup

When I was a kid, my Mom made this soup every time one of us didn’t feel well. It’s one of those memories you can taste when you think of it. She did a more traditional version with chicken and white flour noodles. My version is full of fresh vegetables and the noodles are half whole wheat but with the same comforting flavor. I wish I could take a photo of the smell that fills the house when it simmers on the stove.

madewithover-9

Pour 14 cups vegetable broth in a large pot. Add 10 large sliced carrots and 8 stalks celery, sliced. Bring to a simmer, then add 2 Tablespoons dried onion, 2 bay leaves, and one teaspoon each dried thyme, garlic powder and oregano.

DSC_3530

While you’re waiting for the soup to heat, make the noodles. In a large bowl, mix 1 1/2 cups all purp. flour and 1 1/2 cups whole wheat flour. Add 1 teaspoon salt and 1/2 teaspoon garlic powder. Make a well in the center and add 3 large eggs and 5 Tablespoons water.

DSC_3531

Mix and add more water by the Tablespoon if it’s too dry. You want a pliant dough that is slightly sticky. Turn out onto a well floured surface and roll to 1/4 inch thick. Slice into noodles with a pizza cutter or sharp knife. My 4 yr old loves to help with that step and its the perfect job to let him get involved. You really can’t go wrong with the noodles, the size doesn’t have to be uniform. Let the noodles dry slightly for around 15 minutes while the soup simmers.

DSC_3538

Once the vegetables are almost tender bring the soup to a boil, then add the noodles. A bench scraper is handy to have for this part since you don’t want to add the noodles in a giant clump.

DSC_3541

Let the noodles boil for 5 minutes and serve with freshly cracked black pepper. Yummy!

madewithover-10

That’s how he blows on his soup. 🙂

This recipe is so simple and rustic and it can be personalized easily. Sometimes I add chopped parsley or basil, frozen peas or broccoli. And of course, you can use chicken or even tofu.

I hope you enjoy this recipe as much as we do.

Green Chile – Goat Cheese Soup

Image

I hope everyone had an amazing weekend!  This Saturday we did a little painting in the kitchen, built a massive train track in the living room, and read a few library books. By Sunday we needed to get out of the house so we escaped the city to go for a hike through nearby Solstice Canyon in Malibu.  It’s great to have access to all the restaurants, shopping, and beaches, but we just need to get away from all the people sometimes.  It was nice to get some exercise without the distraction of all the crazy traffic and constant noise.

Image

The trail was easy for our little guy.  There are a few old houses along the way that were burned in wildfires many years ago, but the road is still there.

Image

Here’s a tree that wasn’t completely burned and is beginning to grow again.  Southern California is plagued with wildfires and it made me happy to see this promise that life goes on.

Image

Image

There was plenty to see.  The boy got filthy and sweaty, AKA he had a blast.  For a six mile hike, he was a trooper.

When we got home, I knew I wanted something easy for dinner so I made my Green Chile – Goat Cheese Soup.  Pretty much everything in it is “my favorite thing ever”.  Creamy goat cheese, spicy green chile’s, plenty of garlic and onion make for a very flavorful and simple soup.

Image

Chop or grate 2 organic onions, 5-8 cloves garlic, and 5 fresh green chile.  Using the grater attachment on a food processor makes it even quicker.  You can substitute canned chile or roasted, or even swap out the NM green chile for Anaheim or Poblano.  In a large pot on med-high heat, saute the veggies in a few tablespoons of olive oil until soft.

Image

Add 4 grated organic potatoes, 2 chopped corn tortillas, and 6 cups of vegetable broth.

Image

Bring to a boil, then simmer until the potatoes are soft.  Remove from heat.  Add 1 cup heavy cream and 4 oz. goat cheese (cream cheese would work too if you don’t like goat cheese), 1/2 cup fresh cilantro, and a teaspoon of kosher salt.  Puree in a blender with a tightly fitted lid till smooth and season to taste. Garnish with extra cilantro or lime zest.

Easy and delicious.  It’s one of our favorites and I hope you enjoy the recipe.

P.s. If you don’t use organic onions and potatoes, cut the number in half since conventionally grown are usually bigger.

Green Chile – Goat Cheese Soup

2-3 Tablespoons olive oil

2 organic onions, chopped or grated

5-8 cloves garlic, chopped or grated

5 fresh green chile, seeded, chopped or grated

4 organic potatoes, chopped or grated

2 corn tortillas, chopped

6 cups vegetable broth

4 oz. goat cheese

1 cup heavy cream

1/2 cup fresh cilantro

In a large pot, heat the olive oil over med-high.  Saute onion, garlic, and chile till soft.  Add potatoes, corn tortillas, and vegetable broth.  Bring to boil, then simmer till potatoes are soft.  Remove from heat and add cheese, cream, and cilantro.  Puree until smooth.  Serve garnished with extra cilantro or lime zest.


Easy Spice Tin Labels

Today was my little guy’s second day at preschool. I can’t say that I accomplished much but I did finally finish labeling and hanging my spice tins. That’s something, right? I’m really happy with the way it turned out and it’s nice not to be digging through a basket to find what I need.

madewithover-5

First I mounted a metal sheet I found at Home Depot on the pantry door. I found the spice tins here… http://www.containerandpackaging.com/catalog/deep-metal-tins/79/#1,0&0&0&0&0&0&0&79&0&0&list&0&0,1 A little over $30 for 48 tins. Not bad!

Next, I purchased round Avery labels at an office supply store. The Avery website allows you to easily add text and graphics to your labels before you print at home. Simple!

Add small magnets to the back, also from Home Depot. All finished! Some crazy people might even alphabetize which will last for around 5 minutes now that the boy is home from school for the day.

What do you think?

madewithover-3

After that, I didn’t get a whole lot finished. We live in beautiful Los Angeles where the weather is almost always perfect. So nice, most people don’t even have air conditioning. But, there’s always a week every year when it is HOT!! Day 3 of 90 degrees and high humidity. Yuck. So, this is what the rest of my afternoon looked like.

DSC_3455

Not even a smidge of guilt, either. 🙂 Happy Thursday!


Sweet Potato Cream Cheese Spirals

Coming up with fun school lunches is not always easy! I was playing around with a few recipes today and came up with these tasty treats. With no added sugar they are perfect for a lunch box. They look and taste like dessert thanks to the pumpkin pie spice and cream cheese but are packed with healthy ingredients to keep your kiddos energized and focused through the day.
I hope you enjoy this recipe as much as we did!

20130903-171242.jpg

This photo was an “outtake” but it made me laugh so here you go.  I guess he thought I wouldn’t notice since I had a giant camera in front of my face.  They do smell pretty tempting!!

Sweet Potato Cream Cheese Spirals

2 sweet potatoes

2 tablespoons olive oil

4 oz. cream cheese

3 cups whole wheat flour

4 1/2 teaspoons baking powder

1 1/2 teaspoons kosher salt

1 heaping tablespoon pumpkin pie spice

1/2 cup or more water

Set cream cheese out to soften.

Peel then chop potatoes into 1″ pieces.  Coat with olive oil and bake at 400 for 35-45 minutes, till easily mashed.  Rice or mash into a large bowl.  Add flour, baking powder, salt, pumpkin pie spice, and water.  Mix well.

Set oven on 350.  On a lightly floured surface, roll dough out till 1/3″ thick and roughly rectangular.  Spread with cream cheese, leaving an inch at the top uncovered.  Roll up tightly, just like a jelly roll.  Using a sharp knife, slice into 1/2″ spirals and place on non stick baking sheet.  If you are having trouble slicing, you can cover and refrigerate the roll for an hour or so.

Bake spirals for 30  to 35 minutes till lightly golden and toasted.  Cool on racks.

Enjoy!